Upgrading Firmware
The firmware can be programmed by the end user using the USB Firmware Update Cable.
Instructions:
1. Download the firmware BIN file
For Headplay SE
-February 1 , 2017
Improvements: fixed a bug in which analog video inputs (AV1 , AV2) would show black screen (audio only, no video) if user cycled through HDMI input- or powered ON the goggles in HDMI mode.
For Headplay HD with INNOLUX LCD
December 7 ,2016
Improvements: Lowered video input latency on AV1 and AV2. Improved from ~60 ms to 10~20 ms. Fixed the black screen flashing which was present in the July21 beta firmware.
AVX9_RV_N070ICG
For Headplay HD with HANNSTAR LCD
Original release
Low latency firmware cannot be made for Headplay HD with Hannstar LCD.
Tip: if your screen is inverted the problem is wrong firmware (Hannstar or Innolux mixed up)
2.Copy your CNDLCD_V39.bin file to a USB drive.
-Put the BIN file in the USB root directory and do not rename CNDLCD_V39.bin
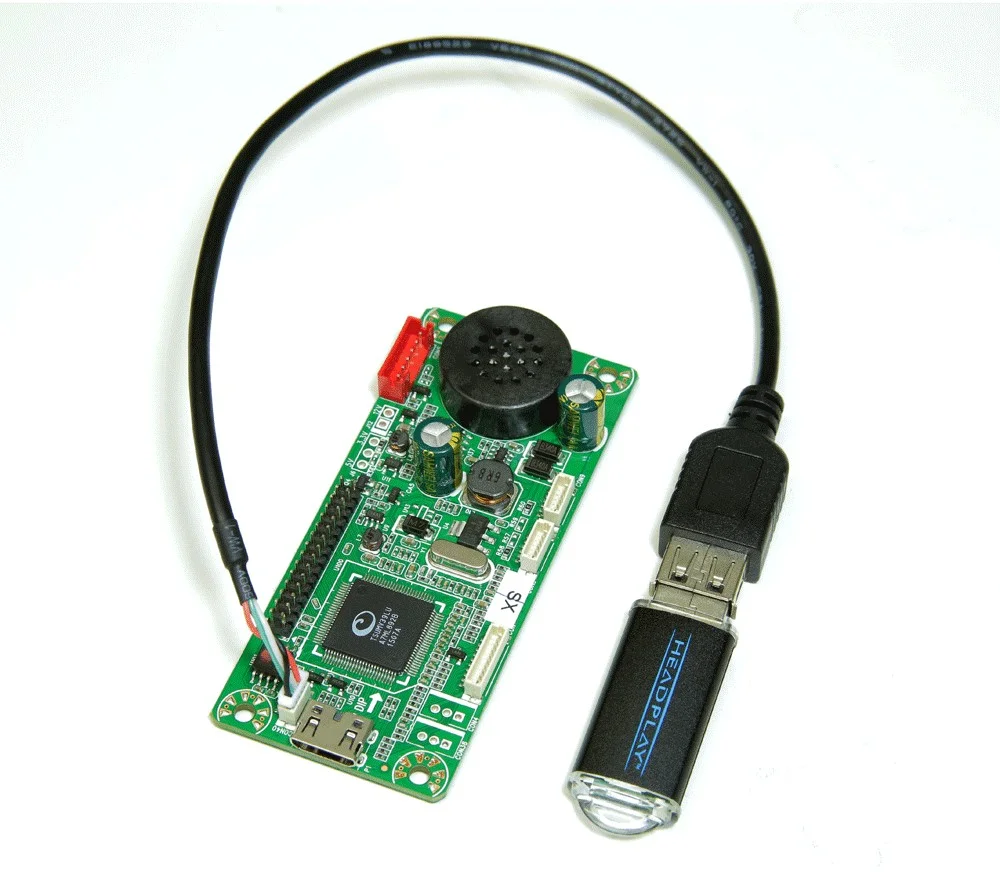
3. Get a USB Firmware Update Cable.
- Buy USB Firmware Update Cable or make one yourself.
Making a DIY Firmware Update Cable:
Find any female USB connector and strip the 4 wires. Solder the USB wires to the Headplay driver board by following the pinout and picture below.
4. Update the Headplay driver board with the new firmware.
Access the Headplay driver board by opening the Headplay housing and unscrewing 10 Phillips head screws..
Do not disconnect any cables from the driver board for updating.
- Power OFF Headplay HD
- Connect the USB stick to the driver board
- Hold menu button on the keypad down while powering ON Headplay SE.
- Release the menu button and confirm the LED on the keypad is now blinking and alternating two colors.
- Wait approximately 1 minute until the blinking stops.
- Update is complete. Remove the USB drive and cycle the power.